Perfectly Creamy Scrambled Eggs
The secret to perfectly creamy, silky-smooth scrambled eggs is patience.
Scrambled eggs are one of the simplest dishes to make, but almost everyone does it wrong:
Scramble the eggs, cook over medium-to-high heat, done in 3 minutes. The result? A rubbery, dry, pile of eggs.
The secret to perfectly creamy, silky-smooth scrambled eggs is patience — in this case, 30 - 40 minutes of patience (the perfect amount of time to listen to a Saturday morning podcast). And it’s absolutely worth it.
(P.S. These perfectly creamy scrambled eggs have no added cream 🤫.)
Perfectly Creamy Scrambled Eggs
Serves: 2
Preparation time: 3 minutes
Cooking time: 30-40 minutes
Ingredients
4 - 5 eggs
Salt and pepper
2 tsp fresh dill, chopped fine (optional)
2 tbsp unsalted butter
Preparation
Crack the eggs into a bowl and beat them with a whisk or fork until the yolks and whites are just starting to combine (you don’t want to beat them until smooth).

Season with salt and pepper (and, optionally, chopped dill).
Place a nonstick skillet over medium heat for about a minute. Add the butter and swirl it around until it just melts, then turn the heat to low.
Add the eggs and cook over low heat, stirring occasionally with a spatula.
Nothing will appear to happen at first. Resist the urge to increase the heat — this is normal. After about 10 minutes, the eggs will begin to form curds.

Continue to cook the eggs on low, stirring every few minutes to break up the curds.

The process might feel like it’s taking forever, but don’t give up! As the curds form, the scrambled eggs will take shape — but with a far creamier texture than you’re likely used to.

After 30-40 minutes, you’ll have perfectly creamy scrambled eggs. Instead of a lump of dry rubber, the result of cooking low and slow is a mixture of soft, silky smooth curds.
Serve immediately.

The Best Kale Salad You've Ever Had
If you’ve been struggling to eat kale straight out of a bag hoping to be healthy, I’m here to save your salads.
It seems like you can’t go anywhere these days without seeing kale on the menu, and with good reason. Kale is one of the healthiest ingredients around. It’s high in vitamins A, C and K, is full of axioxidants that help fight inflamation, and can even act as a natural detoxifier for your body.
The only problem? If it’s not prepared correctly, raw kale tastes bitter and has a fibrous texture that can be off-putting to even the most diehard health nut. If you’ve been struggling to eat kale straight out of a bag hoping to be healthy, I’m here to save your salads!
Thankfully, preparing kale correctly takes only a few seconds. Once you learn to do it right, there’s no going back.
And what makes this both the best kale salad you’ve ever had and one that you’ll add to your regular meal rotation?
Two things:
It’s made with Your Favorite Ingredients™
You always have those ingredients ready-to-go
Before we jump into the recipe, it’s helpful to understand the basics of what makes a good salad, so that you can be sure you’ve got the right ingredients ready.
The Basics of a Good Salad
A good salad combines multiple ingredients from each of the following categories:
Textures
Flavors (sweet, salty, umami and, potentially spicy and/or bitter)
Healthy food groups (proteins, vegetables, grains, healthy oils, beans and/or fruits)
Colors (because you eat with your eyes!)
Making sure that your salad has at least three different items from each category will give you a delicious, complex and incredibly healthy meal every single time.
It’s worth noting that how a particular ingredient fits in will often depend on how you prepare it. For example, a protein like chicken can be neutral in flavor (plain grilled chicken), sweet (e.g. teriyaki chicken) or spicy (e.g. cajun chicken). Similarly, garbanzo beans / chickpeas can provide a soft texture if they’re boiled or a crunchy texture if they’re fried.
Here are some of my favorite ingredients to use, by category:
Textures
Soft: avocado, cherry tomatoes, goat cheese, queso fresco, fish, boiled eggs
Hard: strawberries, red pepper, prawns
Crunchy: croutons, sunflower seeds, fried chickpeas, green beans, snap peas
Flavors
Sweet: berries, tomatoes, avocado, bourbon braised smoked tofu, dried cranberries
Salty: seasoned croutons, parmesan cheese, anchovies, caesar salad dressing
Umami: steak, salmon, sesame oil, teriyaki / soy sauce
Spicy: blackened / cajun chicken, jerk chicken
Bitter: Coffee-crusted steak, broccoli, asparagus
Food Categories
Proteins: chicken, salmon, steak, prawns, tofu, boiled eggs
Vegetables: snap peas, asparagus, red pepper
Fruits: cherry tomatoes, avocado, blueberries, strawberries
Beans: edamame beans, black beans, green beans
Grains: croutons, sunflower seeds, corn, puffed quinoa
At the bottom of this page, I’ve included a selection of my favorite salads. So let’s get into it:
Kale Salad
Serves: 2 as a main / 4 as a side
Preparation time: 10 minutes
Ingredients
1 bunch of curly kale
2 tbsp extra-virgin olive oil
Your Favorite Ingredients™ (see below for suggested recipes)
Preparation
Remove the kale leaves from their stems and tear into bite-sized pieces. Place the kale leaves into a large bowl and discard the stems.

The key to a good kale salad is to massage the kale with extra-virgin olive oil, which breaks down the fibrous leaves, thus softening their texture, while removing the natural bitterness of the kale.
To do this, pour the olive oil over the bowl of leaves and then use your hands to gently massage the kale. As the olive oil coats the kale leaves and you massage them, you will noticeably feel the texture change after 1-2 minutes. There should be just enough olive oil and the leaves get coated (and your hands feel oily!) but not so much that it pools at the bottom of the bowl.

Let the kale sit for 5-10 minutes after massaging — this is when you slice, dice and prepare the rest of Your Favorite Ingredients™.
Once you’ve got everything ready, assemble your salad as follows:
1. Take ⅓ of each of Your Favorite Ingredients™ and add them to the bowl with the massaged kale leaves.
2. Drizzle your salad dressing of choice overtop of the bowl. Note: if you are making your own oil-based dressing, remove 1 tbsp of extra-virgin olive oil to account for the extra oil already in the salad.
3. Mix the ingredients together and divide into serving bowls.
At this point, your salad dressing should be nicely mixed in with the kale leaves and a portion of Your Favorite Ingredients™. You’re probably wondering, “Why did we only add ⅓ of Your Favorite Ingredients™?”
When you add all of the ingredients to a salad before mixing, they fall down to the bottom of the bowl (you know what I’m talking about 😉). As a result, you end up with a salad that doesn’t deliver balanced, multi-textured bites. By mixing ⅓ of each of Your Favorite Ingredients™ into the salad and plating the rest on top, you end up with a salad that looks and eats like it should.
Which leads to the final step:
4. Evenly distribute the remaining ⅔ of Your Favorite Ingredients™ on top of the salads, in the following order:
Soft and hard ingredients first (vegetables, fruits, etc.)
Crunchy ingredients next (croutons, seeds, etc.)
Protein third
Herbs or garnishes last
Doing this takes only a minute or two, but it ensures that each and every salad you make is truly the best kale salad you’ve ever had.
(And yes, I do this every time I make a salad — just ask my coworkers.)

Suggested Recipes
Here are examples of kale salads with my Favorite Ingredients™ (each recipe serves 2 mains, as above):
Kale Caesar Salad with Blackened Chicken
1 bunch massaged curly kale (as above)
1 blackened or cajun-spiced grilled chicken breast, sliced
½ avocado, cubed
12 cherry tomatoes, halved
½ cup garlic croutons
⅓ cup caesar salad dressing (if making from scratch, I love this recipe)
¼ cup shredded Parmesan cheese
6 anchovy fillets (optional)
Kale Salad with Bourbon Braised Smoked Tofu
1 bunch massaged curly kale (as above)
2 cups Bourbon Braised Smoked Tofu
½ avocado, cubed
12 cherry tomatoes, halved
½ cup garlic croutons
½ cup boiled or grilled corn, removed from cob
½ cup boiled edamame beans, removed from shell
Combine 2 tbsp of the BBQ sauce from the tofu with 1 tbsp of extra-virgin olive oil and squeeze of lime juice for the dressing
Kale Salad with Coffee-Rubbed Steak
1 bunch massaged curly kale (as above)
1 NY striploin, crusted in bourbon smoked chili & coffee rub and grilled medium-rare, sliced
½ avocado, cubed
12 cherry tomatoes, halved
½ cup blueberries
½ cup red pepper, diced
½ cup garlic croutons
Balsamic vinaigrette (1 tbsp extra virgin olive oil + 2 tbsp aged balsamic vinegar + salt & pepper, to taste)
Kale Salad with Pan-Seared Duck Breast
1 bunch massaged curly kale (as above)
1 pan-seared duck breast, sliced
12 cherry tomatoes, halved
½ cup blueberries
½ cup red pepper, diced
¼ cup dried cranberries
½ cup garlic croutons
Orange-balsamic vinaigrette (1 tbsp extra virgin olive oil + 2 tbsp aged balsamic vinegar + orange zest + salt & pepper, to taste)

Kale Salad with Bourbon Braised Smoked Tofu
Perfect Yogurt Parfait
What if I told you that you could have ice cream for breakfast every morning, and it would be one of the healthiest breakfasts possible?
What if I told you that you could have ice cream for breakfast every morning, and it would be one of the healthiest breakfasts possible?
That’s the pitch my wife made to me years ago, and believe me, I was skeptical.

Then she pulled it off.
The trick? Using flavored liquid stevia as a sweetener.
Yogurt has an incredible number of health benefits. The problem is, plain yogurt tastes pretty awful. Flavored yogurts taste great, but contain a significant amount of added sugar. And while there are some low-sugar flavored yogurts on the market, they often include a host of ingredients that normally wouldn’t find their way onto a yogurt label.
By taking your favorite, healthy plain yogurt (cow milk, sheep milk, or greek yogurt — for extra protein) and adding a few drops of vanilla-flavored liquid stevia, you instantly have healthy breakfast magic.
With incredible tasting vanilla yogurt as your base, you can then top with your favorite fruits or berries and, optionally, granola.
(Speaking of which, if you happen to find yourself in Montreal, I encourage you to visit La Finca and pick up a jar of their homemade granola. I have no idea what kind of French Canadian black magic is in that stuff, but it’s absolutely addictive. Just don’t have too much, or you’ll completely negate the low-sugar premise of this entire recipe 😂.)
Perfect Yogurt Parfait
Serves: 1
Preparation time: 5 minutes
Ingredients
1 cup plain yogurt (cow milk, sheep milk, greek yogurt, etc.)
2-3 drops of vanilla liquid stevia
½ cup berries or other sliced fruit
½ cup granola (optional)
Preparation
Combine yogurt with 2-3 drops of vanilla liquid stevia in a serving bowl.
Top with fruit and optional granola.
Enjoy!

Cullen Skink
Cullen skink is one of my favorite dishes to eat when it’s cold. It’s a a traditional, Scottish chowder made with smoked fish (think “New England clam chowder, but with smoke fish instead of clams”).
If you’ve never been to Scotland, then you’ve likely not heard of cullen skink before. After haggis, cullen skink is undoubtedly one of Scotland’s most famous dishes. It’s a traditional, cream-based chowder made with smoked fish (think “New England clam chowder, but with smoked fish instead of clams”). The dish originated in the town of Cullen in the far north of Scotland. Today, it can be found on the menus of most pubs and restaurants across the country.

The majestic Isle of Skye
Cullen skink is one of my absolute favorite dishes to eat when it’s cold. Whereas New England clam chowder uses bacon to add a degree of smokiness to the soup, cullen skink gets it directly from the smoked fish. The depth of flavour that gets infused into the soup as a result is next level — even the best New England chowders don’t come close.
Traditional cullen skink is made with smoked haddock (known as finnan haddie in Scottish), an ingredient that’s incredibly difficult to find in North American. Thankfully, we have something on this side of the pond that can serve as a worthy substitute: smoked black cod.
Black cod (also known as sablefish) is one of my favorite ingredients from the Pacific Northwest (I’ve previously shared a recipe for miso-marinated black cod that you should definitely check out). Many seafood markets (and even grocery stores) carry smoked black cod, so it’s relatively easy to come by (though by all means, try making this dish with finnan haddie if you can find it).
Cullen Skink
Serves: 4 - 6
Preparation time: 10 minutes
Cooking time: 30 minutes
Ingredients
1 lb cold-smoked black cod (or finnan haddie — aka Scottish smoked haddock)
4 cups of whole milk
3 tbsp unsalted butter
1 medium yellow onion, diced
1 medium leek, diced thin (see Notes)
Juice from ½ lemon
1 lb Yukon gold potatoes, pealed and cut into ¼-inch cubes
½ cup of heavy cream
1 bay leaf
Kosher salt and freshly ground black pepper
Cholula (or another vinegar-based hot sauce)
Preparation
Pour the milk and bay leaf into a medium saucepan. Heat at medium-high until barely simmering and reduce the temperature to medium low (you want the milk to be barely simmering but never actively boiling, as that will dramatically change the flavor of the milk — and not in a good way).
Add the smoked black cod to the saucepan and cook the fish until it just barely starts to flake (5-6 minutes). The fish will significantly plump in size as it absorbs the milk and rehydrates.
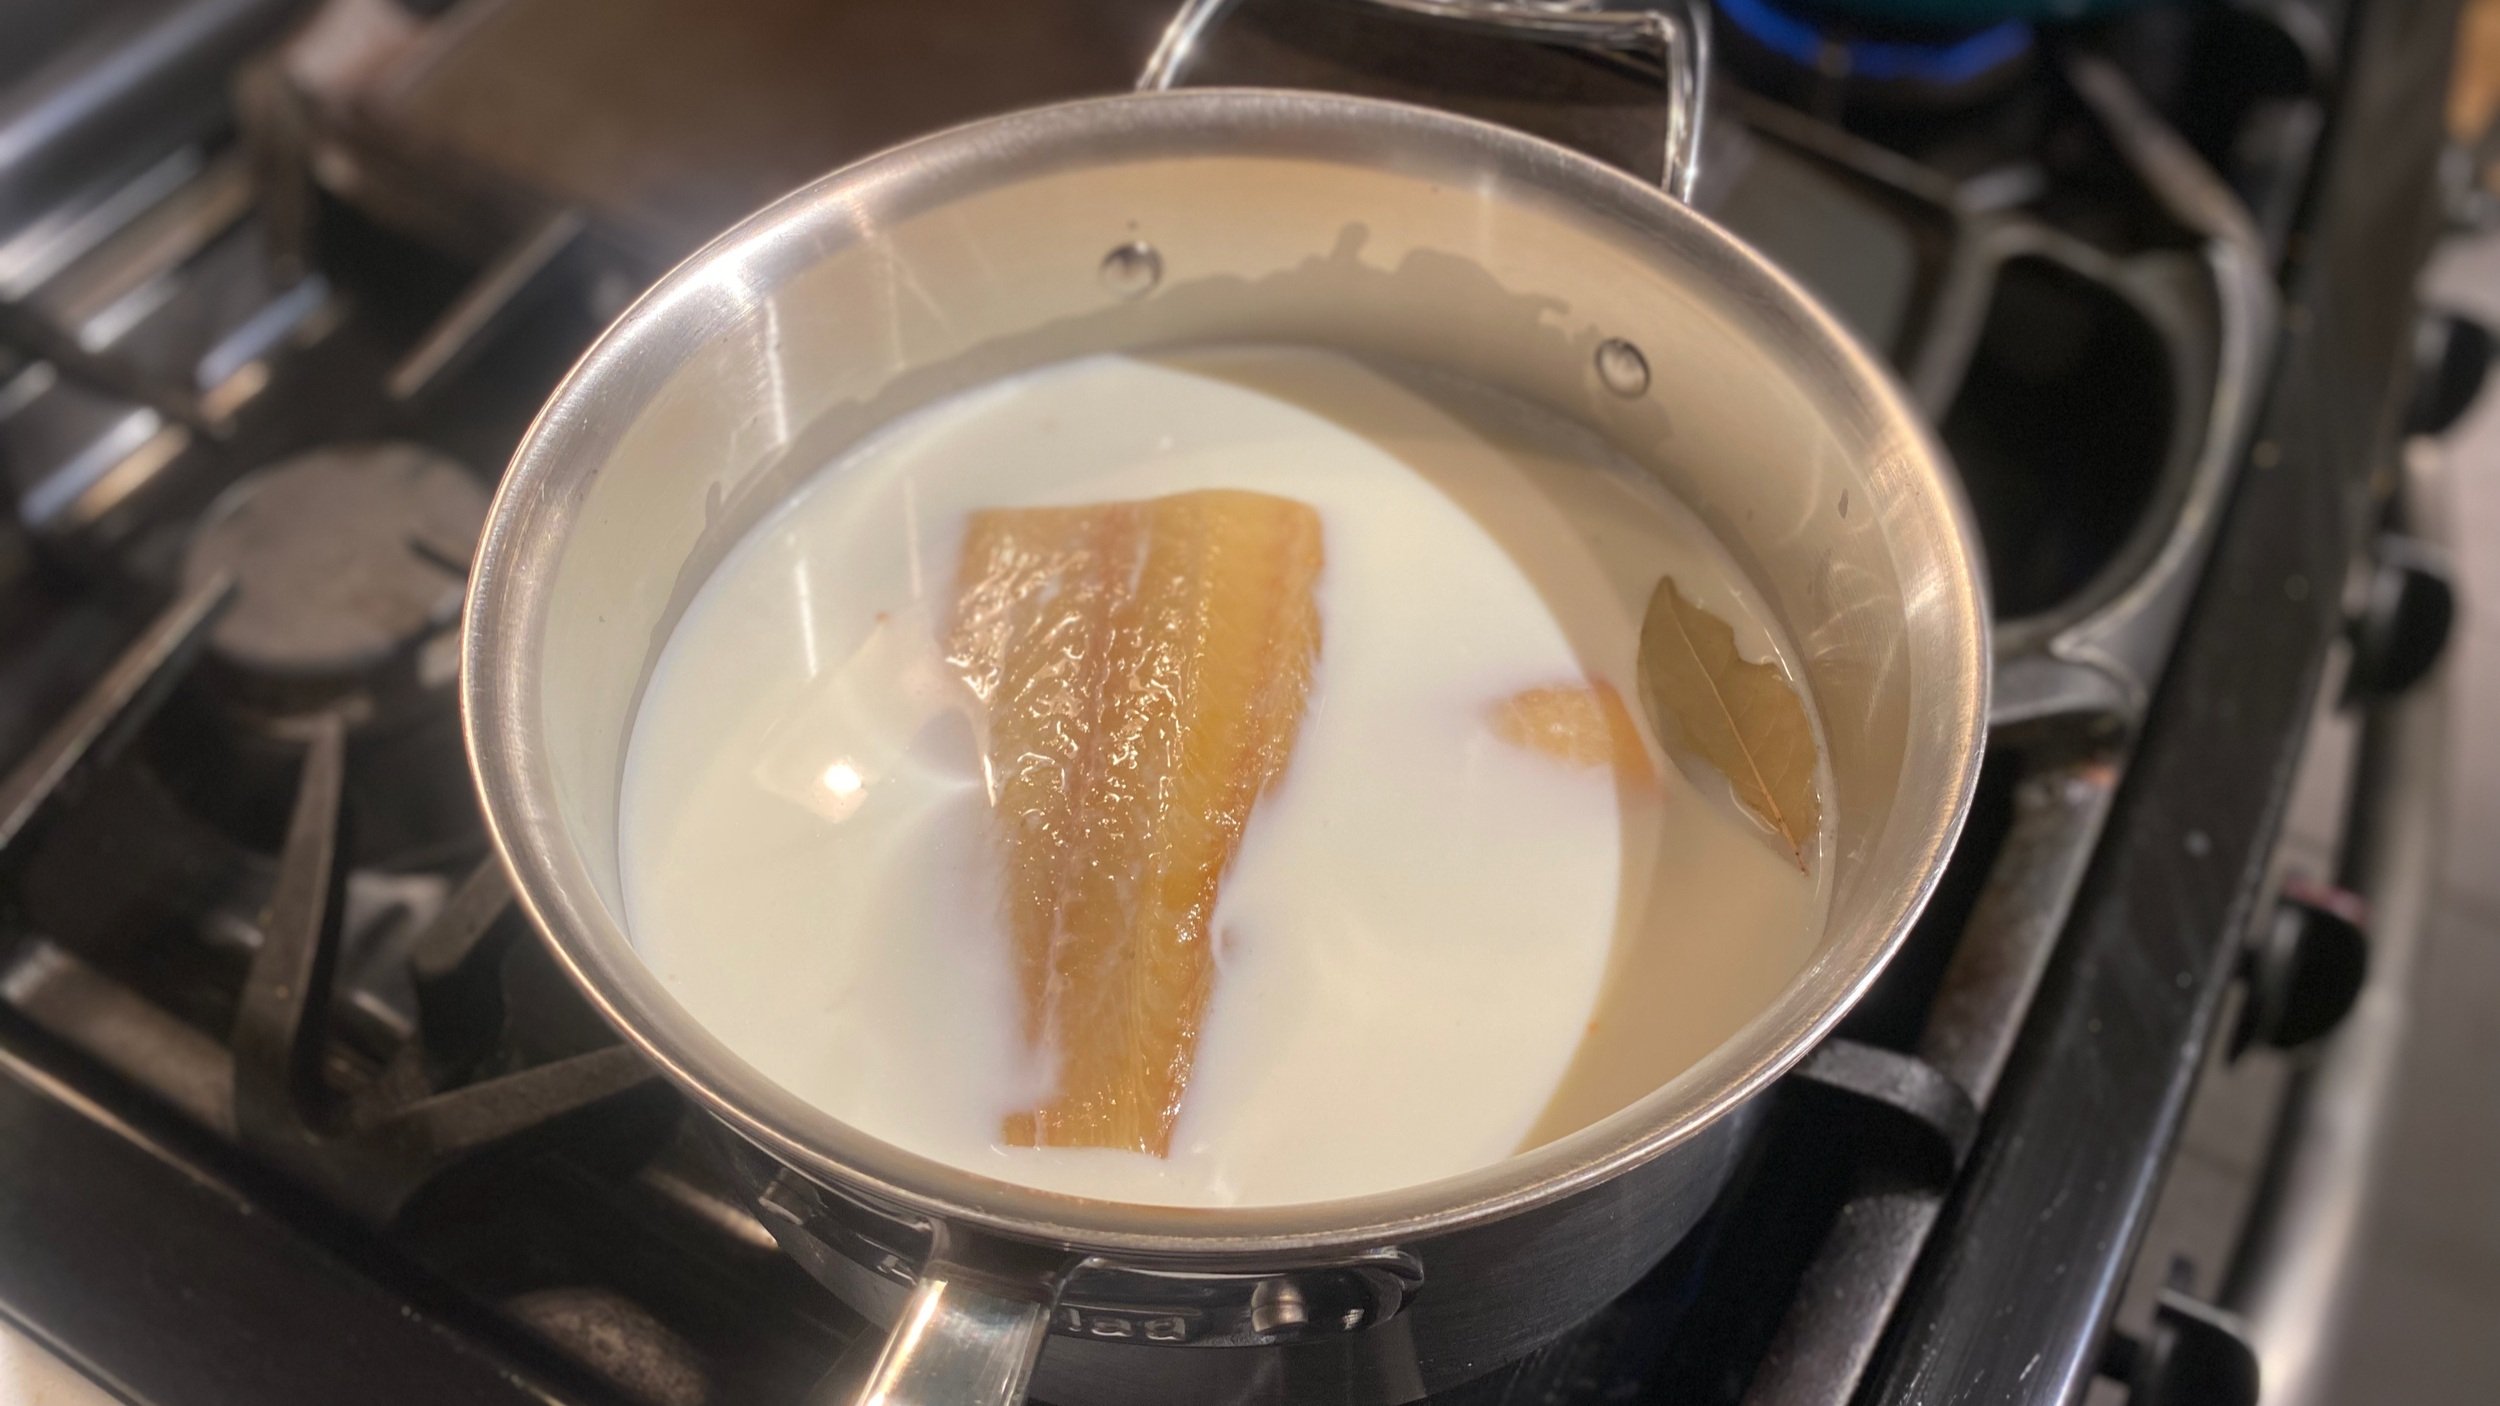
Remove the fish from the milk and place on a paper towel-lined plate to drain.

Remove the bay leaf from the milk and discard. Pour the milk into a heatproof bowl and set aside.
Place your Dutch oven or a large pot onto the stove and heat to medium-high (if reusing the same saucepan from before, make sure to thoroughly wash it before proceeding to this step). Heat the butter until it melts and stir in the onions and leeks.
Sweat the onions and leeks for about 10 minutes while stirring frequently. The longer you sweat the mixture down, the sweeter and more flavorful your soup will be. Reducing the heat if it starts to scorch at any point.

Add the lemon juice, several grinds of black pepper and 4-5 dashes of Cholula and sweat for 2-3 more minutes, stirring frequently.
Mix the potatoes into the pot and cook for 5 more minutes, stirring regularly. This will both infuse the potatoes with the flavor of the onions and leeks while helping to release some of the starch from the potatoes (which thickens the soup).

Pour the milk that was previously used to cook the fish into the Dutch oven and heat until it is just barely simmering (again, make sure it doesn’t boil). Cook until the potatoes are tender, about 10 minutes. Make sure to regularly stir and scrap the pot so that the milk does not scorch.
While the soup is simmering, peel the skin off of the fish and remove any bones. Pull the fish apart into bite-sized pieces (it should flake naturally) and set aside.

Once the potatoes are tender, use a potato masher (or a large wooden spoon) and press into the soup 4-5 times to crush some of the potatoes. The idea here isn’t to mash all of the potatoes. The goal is to break up a portion of them in order to get a variety of shapes and sizes while releasing more of the solids to thicken the soup.
Add the shredded fish and heavy cream to the soup and stir to combine. Let cook an additional 2-3 minutes and then season to taste with salt and pepper.

Serving
Serve immediately and top with chives.
Cullen skink can be kept for 2-3 days refrigerated.

Notes
The use of leeks adds a distinct sweetness to cullen skink. Some recipes omit the leeks to reduce the sweetness of the soup. If you find this recipe to be too sweet for your likely, feel free to omit the leeks.
Bourbon Braised Smoked Tofu
This delicious and easy-to-make recipe provides a memorable vegan/vegetarian option for BBQs and is great for anyone (it’s in frequent rotation at the Neumann household).
I do a lot of smoking, which typically entails making ribs, brisket, pulled pork and other meaty classics. But smoking isn’t only about meat. This delicious and easy-to-make recipe for Bourbon Braised Smoked Tofu provides a memorable vegan/vegetarian option for BBQs and is also great for anyone (it’s in frequent rotation at the Neumann household).
If you don’t have a smoker, you can prepare it in your oven (you just lose out on the smokey goodness).
Bourbon Braised Smoked Tofu
Adapted from Brown Sugar Kitchen by Tanya Holland.
Serves: 4-6
Preparation time: 5 minutes
Cooking time: 60 minutes
Ingredients
1 454g (1 lb) package of firm tofu
½ tsp kosher salt
½ tsp paprika
½ tsp onion powder
¼ tsp garlic powder
¼ tsp ground black pepper
¼ tsp dried oregano
¼ tsp dried thyme
1 cup bourbon BBQ sauce
2 cups water
Preparation
Remove the tofu from the package and gently press on all sides with a paper towel to remove the excess moisture. Cut into ¾-inch / 2-cm cubes.
In a large bowl, combine the salt, paprika, onion powder, garlic powder, black pepper, dried oregano and dried thyme. Add the tofu cubes and toss to coat.

Cooking
Prepare smoker at a temperature of 225 - 250ºF with a light wood (alder, apple, maple or hickory). This is the same temperature range you typically use for ribs, brisket and many other meats, so you can easily slide this into your smoker alongside other foods if you’re preparing a vegan option for a BBQ).
If you don’t have a smoker, preheat your oven to 225ºF.
Spread the tofu in a single layer on a grilling pan (or a baking sheet lined with parchment paper if you’re cooking in the oven).

Put the tofu in your smoker and cook until the tofu is infused with the flavor of the smoke — 25 - 30 min. If using an oven, cook the tofu for 25 minutes.

While the tofu is cooking, combine the BBQ sauce and water in a large sauce pan. Bring to a boil and then reduce to barely a simmer. Cook the mixture until it thickens (about 25 - 30 min). If you’re doing this right, the tofu and braising liquid will be ready at the same time 😃.
Remove the tofu from your smoker or oven. It should have a nice golden color.

Add the smoked tofu to the saucepan and simmer until the tofu is infused with the sweet, smokey flavor of the BBQ sauce.
Serve immediately.

Notes
For this recipe, you can use your favorite BBQ sauce or experiment with different flavors. Using a molasses-based BBQ sauce, for example, will give you a thicker, “stickier” sauce with a heavier flavor than using a ketchup-based sauce.
My favorite choice for this recipe (and most things) is bourbon BBQ sauce. This recipe from Meat Church is easy-to-make and, with a heavy dose of pepper, holds up well to smoked flavors.
Pan-Seared Duck Breast
Duck is a great source of protein and iron, easy to prepare and absolutely delicious. The key to delicious duck breast is crispy skin, and the key to crispy skin is cooking it low and slow.
I’m a huge fan of duck. It’s a great source of protein and iron, easy to prepare and absolutely delicious (it’s also a lot cheaper than you might expect given what most restaurants charge for it).
The key to delicious duck breast is crispy skin, and the key to crispy skin is cooking it low and slow. This recipe — inspired by Chef Thomas Keller’s Ad Hoc at Home cookbook — uses balsamic vinegar, orange zest and nutmeg to add brightness to the natural flavor of the duck.
Pan-Seared Duck Breast
Adapted from Ad Hoc at Home by Thomas Keller.
Serves: 2
Preparation time: 10 minutes (followed by 1 - 12 hours of resting time)
Cooking time: 30 minutes
Ingredients
2 duck breasts
1 orange
2 bay leaves
2 sprigs of thyme
Balsamic Vinegar
Ground nutmeg
Salt and pepper
1 tbsp vegetable oil (for cooking)
Either 1/4 cup of blueberry jam or 1 cup of dry red wine plus 1 tbsp of butter (see Cooking below)
Preparation
(For best results, the duck should be prepped and refrigerated 8 - 12 hours before cooking, so try to do this in the morning before work.)
The first preparation step is to “score” the duck skin. To do this properly, you’ll want to make sure the duck is cold (so remove it from the fridge and score it right away). Use your knife to cut a cross hatch pattern with lines approximately one inch apart. Be careful to only cut the skin and not pierce the flesh underneath (though don’t be surprised if you do the first few times you try this — it’s okay).

Some butchers will score the skin for you
Next, flip the duck breast over. You should notice a tendon running the length of the breast. Use a paring knife to carefully remove the tendon.
Season the flesh side of each duck breast with salt, pepper and a pinch of nutmeg. Grate a small amount of orange zest onto the flesh using a microplane (or the finest setting on a cheese grater, if you don’t have one). Next, sprinkle a few drops of balsamic vinegar onto the flesh. Finally, place one sprig of thyme in the center of the duck breast and cover it with a bay leaf.

Flip the duck breast back over and season the skin side with a generous pinch of salt and a pinch of nutmeg.
Place the duck breasts skin side down on a baking sheet lined with parchment paper and refrigerate uncovered for at least 1 hour and up to 12 hours. This step is crucial, not only because it allows the flavors of the seasoning to penetrate the duck flesh, but because the salt acts to remove moisture from the skin, which is essential to getting nice, crispy skin.
Cooking
Preheat the oven to 300ºF.
In a large, oven-proof pan, heat the oil over medium-low heat. Remove the thyme and bay leaves from the duck breasts, placing the thyme springs in the side of pan so that the duck fat gets infused with the flavor of the thyme.
Place the duck breasts skin side down and sear the skin on low (this is the part that takes some patience). It will take about 20 - 25 minutes to get a nice, crispy skin. Periodically use a small spoon to remove excess duck fat from the pan (make sure to keep this for other uses!). Move the duck breasts around every few minutes to ensure even browning.
Once the skin is nice and brown (see below), flip the duck breasts over and “kiss” the flesh side for about 30 seconds. After that, flip the duck breasts back over so the skin side is down and place the pan in the oven (remove the thyme sprigs before placing the pan in the oven).

Cook the duck breasts for about 5 minutes for medium rare (the internal temperature should be 125ºF).
Remove the duck breasts from the oven and place them skin side down on a cooling rack (it’s really important that you use a cooling rack and not rest them directly on a plate or cutting board — doing so will ensure that any juices that drip off fall through the cooling rack as opposed to pooling and ruining your nice, crispy skin!).
While the duck breast are resting for 5 - 10 minutes, you can choose one of the following finishes:
Warm, blueberry jam
Blueberries and duck is a natural pair. Take 1/2 cup of your favorite blueberry jam and warm it in a small saucepan.
Red wine reduction
Pour any excess fat from the pan you used to cook the duck and pour the red wine into the pan. Increase the temperature to medium high while using a wooden spoon to scrape up any tasty browned bits.
Simmer the wine until it reduces to 1/3 (about 5 minutes). Reduce the temperature and add the butter, along with salt and pepper to taste.
Serving
Slice each duck breast into about 8 slices.

Plate each duck breast, topping either with warm blueberry jam or red wine reduction.
Duck breast pairs with all manner of side dishes, including potatoes, risotto, roasted root vegetables or kale salad.

Mashed Sweet Potatoes
Sweet potatoes aren’t just for Thanksgiving. This easy-to-make recipe uses brown butter to add a depth of flavor to the traditional favorite.
For as popular as sweet potato fries are, most people I know only eat mashed sweet potatoes at Thanksgiving and Christmas. But sweet potatoes are full of vitamins, easy to make, and absolutely delicious. After trying this recipe, they’ll be in regular rotation at your home (especially if you have kids!).
But first, let’s talk about the types of sweet potatoes. Everyone is familiar with orange sweet potatoes, but there are actually many different types. In North America, you’ll find 5 different varieties of sweet potatoes in most grocery stores:
Orange skin with orange flesh
Purple skin with purple flesh
Yellow skin with white flesh (aka hannah sweet potatoes)
Red skin with orange flesh (aka garnet sweet potatoes)
Purple skin with white flesh (aka Japanese sweet potatoes)

Each variety of sweet potato has a unique flavor and texture. For this recipe, I recommend using either traditional orange sweet potatoes or Japanese (purple skin / white flesh) sweet potatoes, as they are naturally the sweetest and have a high moisture content.
The secret to this recipe is the brown butter, which adds a depth of flavor and balance to the sweetness of the potatoes and maple syrup.
Mashed Sweet Potatoes
Serves: 4 - 6 people as a side dish
Preparation time: 10 minutes
Cooking time: 2 hours
Ingredients
4 lbs of sweet potatoes — about 4 large potatoes
For this recipe, I recommend using traditional orange or Japanese sweet potatoes, as they are naturally the sweetest
8 sprigs of thyme (6 sprigs whole / 2 sprigs with leaves removed and chopped)
6 tbsp unsalted butter
1/4 cup maple syrup
Pinch of salt
Preparation
Adjust oven rack to center position and preheat to 300ºF.
Take two large sheets of heavy-duty aluminum foil and place them on top of each other. Put 2 of the sweet potatoes in the center of the sheet and place 3 sprigs of thyme on top.

Fold up the foil and crimp tightly (the goal is to steam the potatoes in their natural moisture, so we want to prevent air from escaping). Then, flip over the packet and wrap in a second sheet of aluminum foil.

Repeat with the other 2 sweet potatoes, place the foil packets side-by-side on a baking sheet and put in the oven for 2 hours.

Remove the sweet potatoes from the oven after 2 hours and open one of the foil packets (be careful, the hot steam will escape!). If the sweet potatoes are fully roasted and cooked through, the skins will appear moist. If they still look dry/matte, close the packet back up and put in the oven for another 15 minutes (you can also test with a toothpick - inserting a toothpick into the potatoes should have no resistance if they’re fully cooked).

When fully-cooked, the sweet potato skin will be moist/glistening
Once the sweet potatoes are fully cooked, open up both foil packets and set aside to cool.
While the sweet potatoes are cooling, melt the butter in a small saucepan over medium-low heat. Gently swirl the butter around until the liquid starts to turn golden brown and smells “nutty” (this should take about 2-3 minutes).
Immediately pour the melted butter into the bowl of a stand mixer fitted with a flat beater attachment (or a large glass or metal bowl if you don’t have a stand mixer). Combine with the maple syrup and the chopped leaves from 2 sprigs of thyme.
Next, peel the skins off of the sweet potatoes. If they’re cooked all the way through, the skins should just “slide” off (be careful not to burn your fingers if they’re still hot). After peeling, check the ends of each potato and remove any discolored nubs. Add the sweet potato flesh to the bowl containing the brown butter, maple syrup and chopped thyme leaves.

Beat the sweet potatoes in your stand mixer on medium low (a setting of 3 or 4 out of 10) for about 2 minutes until smooth and fluffy. If you don’t have a stand mixer, use a handheld mixer. If you don’t have a handheld mixer, it’s time to roll up your sleeves and get to work.
Season to taste with a pinch or two of salt (just enough to cut the sweetness).
Serving
Serve immediately or make ahead (mashed sweet potatoes will last 4 - 5 days in the refrigerator or up to a year in the freezer).

Miso-Marinated Black Cod
Made famous by Nobu, this traditional approach to cooking black cod (sablefish) from Kyoto involves marinating the fish in a white miso-based marinade for 2-3 days.
Peruvian-Japanese restaurant chain Nobu is one of the most recognizable brands in the culinary world. At the core of this restaurant powerhouse is Chef Nobuyuki Matsuhisa’s elevated take on Peruvian-Japanese cuisine. (The fact that his restaurants are name-dropped in countless songs certainly hasn’t hurt.)

Eatin' crab out in Malibu at Nobu
Introduced back in 1994, the restaurant’s most famous dish involves a surprisingly simple preparation that makes it ideal for busy founders. The approach, known as saikyo yaki, is a method of preparing fish that involves marinating the fish in a white miso-based marinade called saikyo shiro miso. It originated in Kyoto before refrigeration was available as a means to preserve fish.
This particular recipe uses black cod (also known as sablefish), a mild white fish native to the North Pacific Ocean (British Columbia, Washington and Alaska). Black cod is high in omega-3 fatty acids, EPA, and DHA, making it extremely healthy. It’s high fat content also makes it very forgiving when cooking — in other words, it’s really hard to screw this recipe up. Black cod is a year-round fishery, so you can get this fish fresh and wild anytime of the year. It’s also relatively inexpensive (in Vancouver, you can even get fresh black cod at Costco!).

But there is one unusual aspect of this recipe to be aware of: the fish must be allowed to marinate for 2 to 3 days.
The high fat content of black cod makes it take longer for the fish to absorb flavors. If you don’t let this recipe marinate for at least 48 hours, you simply won’t get the deep flavor of the miso for which this dish is famous. For optimal freshness, you should marinate the fish the same day you buy it. So if you buy and marinate your fish on a Monday, you should plan to cook and eat it for dinner on Wednesday or Thursday. And so on.
This recipe specifically uses white miso, which is milder and sweeter than other forms of miso. Most grocery stores will carry at least one brand of white miso, but be aware that taste and quality vary widely by brand. My favorite North American miso producer by far is a small craft producer in San Francisco called Aeden Fermented Foods. In fact, this miso is so good that I regularly bring back 2 or 3 containers when I’m visiting San Francisco.

Miso-Marinated Black Cod
Adapted from Nobu: The Cookbook by Nobuyuki Matsuhisa.
The recipe below is for one full fillet (side) of black cod. To make more, simply increase the recipe accordingly.
Serves: 2 - 3
Preparation time: 5 minutes
Cooking time: 15 minutes (2 - 3 days later)
Ingredients
1 full fillet (side) of black cod or 4 x 8oz portions
¼ cup sake
¼ cup mirin
¼ cup white miso paste
3 tbsp granulated sugar
2 tbsp vegetable oil (for cooking)
Preparation (2 - 3 days before cooking)
In a small saucepan, bring the mirin and sake to a boil over high heat. Let it boil for 20 - 30 seconds to give time for the alcohol to evaporate.
Reduce the heat to low, then add the miso paste and whisk until it has completely dissolved (note: there may still be “chunks” of soybean in the mixture if the miso itself is not smooth).
Turn the heat back up to high, add the granulated sugar and whisk until the sugar has completely dissolved. Make sure to whisk constantly during this part, so that the sugar does not burn at the bottom of the saucepan.
Remove the saucepan from the stove and pour the marinade into a bowl, then let it cool to room temperature.

While the marinade is cooling, remove the black cod from the packaging and pat dry with a paper towel to remove excess moisture.
To marinate, you can either place the fish into a Tupperware container or use Ziplock bags. For full fillets, I find that using quart-sized Ziplock bags with the fillet folded in half yields the best results (as there is very little room for air). Pour the marinade into the container, ensuring that the fish is completely slathered, and then place in the fridge for 2-3 days. If using a Ziplock bag, turn the bag over once per day to make sure the fish gets full coverage from the marinade.

Cooking
Preheat the oven to 400ºF.
Remove the container of marinating fish from the fridge and get a large plate. One at a time, remove each fillet or fish portion from the container and use your fingers to remove excess marinade from the fish (you don’t want to rinse the fish…you just want to remove excess marinade so that it doesn’t burn when cooking). After removing the excess marinade, place each fillet or fish portion on the plate.

After 2-3 days, the black cod will take on a dark golden color from the miso marinade
In a large, oven-proof pan, heat the vegetable oil over medium-high until shimmering. Place the fish flesh-side down (skin-side up) in the pan and cook until the marinade starts to caramelize and the flesh begins to brown (or even blacken in a few spots). This should take 2-3 minutes.

If you don’t have really large pans, portion the fillets before marinating
Carefully flip the fish over so that the skin side is down. Cook for 1 more minute to allow the skin to slightly crispen and place the pan into the oven.
Cook for 5 - 10 minutes until the fish is opaque begins to slightly flake.
Serving
I generally serve this with rice and one or two steamed or stir-fried vegetables (bok choy, broccoli, edamame and gai lan are all favorites in the Neumann household).

(The fish on the left is slightly over-cooked — there should not be that much flaking 😉)
Coq Au Vin
Even if you know nothing about French cuisine, you almost certainly have had coq au vin. Originally popularized in North American in the 60s by Julia Child, this receipt is easy-to-make and full of flavor.
Even if you know nothing about French cuisine, you almost certainly have had coq au vin at some point in your life. Literally translated as “rooster/cock with wine”, this traditional French dish was first popularized in North America in the 60s in Simone Beck, Louisette Bertholle and Julia Child’s groundbreaking two-volume cookbook, Mastering the Art of French Cooking.
Making coq au vin is relatively straight-forward, though it is fairly involved. Unlike many of the recipes I share, this one requires about 90 minutes of active work — so it’s better suited for a weekend (when you can listen to an audiobook and relax), then trying to prepare it on a work day in-between calls. Start-to-finish, making coq au vin takes about 3 hours, so start around 3:00 or 4:00pm in order to have it ready for dinner.
Coq au Vin
Serves: 6 people
Preparation and active cooking: 90 minutes
Passive cooking: 90 minutes
Ingredients
2 small whole chickens, quartered (about 3 pounds each, see Notes below)
2 cups dry red wine (merlot, chianti or similar)
1/4 pound bacon, cut into ¼” lardons (strips)
8 oz pearl onions (see Notes)
8 oz small cremini mushrooms
3 medium carrots, diced
4 cloves garlic
2 sprigs thyme
2 bay leaves
2 cups low-sodium chicken stock
3 tbsp unsalted butter
¼ cup flat-leaf parsley,
Kosher salt and pepper
Tools and Supplies
Large (6.7L) Dutch oven
Wooden spoon
Kitchen tongs
Slotted spoon
1-gallon Ziploc bag
Rimmed baking sheet with wire rack
Paper towels
Preparation
We’re literally making “chicken in wine”, so the first step obviously has to be “put chicken in wine”.
Put your quartered chicken (see Notes below) into a 1-gallon Ziploc bag and add the wine. Press as much air as you can out of the bag and seal. Set aside while you prepare the rest of the ingredients, turning every 5 minutes or so to make sure every inch of chicken gets soaked in delicious wine.

Preheat the oven to 350ºF.
Dice the carrots and prepare the pearl onions (see Notes below). Assuming you have small cremini mushrooms, cut them into quarters. If your mushrooms are larger, cut them into sixths or eights (the goal is to make sure the mushroom pieces are bite-sized). Peel the garlic and smash it with the side of your knife, but do not cut.

Heat Dutch oven over medium and add bacon lardons. Cook for about 10 minutes, stirring frequently, until bacon has rendered and turned brown (adjust heat if necessary to avoid scorching). Brown streaks should appear on the bottom of your Dutch oven as you’re cooking, but you don’t want them to turn black (this is scorching / burning, which will affect the flavor of the dish).

Remove the Dutch oven from heat. Use a slotted spoon to remove the cooked bacon lardons and place on a paper towel-lined bowl or plate.

Remove the chicken from the Ziploc bag and pat dry on a plate (make sure to seal the Ziploc bag back up — we’re going to use the wine later and you don’t want it to spill!). Season chicken with salt and pepper.
Return the Dutch oven and it’s rendered bacon fat to the stove and increase heat to medium-high. Add half of the seasoned chicken, skin side down, and cook until browned (6-7 minutes). After the skin side of the first batch of chicken has browned, use your tongs to flip the chicken over and cook for another 5 minutes.

Remove the first batch of chicken from the Dutch oven and place (skin side up) on the wire-rimmed baking sheet.
Repeat this process with the second half of the chicken pieces.

Once all of the chicken has been browned on both sides and is resting on the wire-rimmed baking sheet, add the mushrooms to the Dutch oven and cook, stirring frequently until nicely browned — about 10 to 12 minutes.
Add the pearl onions, carrots and garlic and cook for 5 more minutes, stirring frequently.

Next, pour the wine from the Ziploc bag into the Dutch oven and use your wooden spoon to scrape up any brown bits.
Add the bacon, thyme, bay leaves and chicken stock and bring to a boil.

Stir the mixture a couple of times with your wooden spoon and remove from heat. Place the chicken legs (not the chicken breasts) into the Dutch oven, skin side up. The chicken legs should be partially submerged with the top of the skin visible above the liquid (the chicken skin will brown while braising). Place in the oven and cook uncovered for 1 hour.

After 1 hour, remove Dutch oven from the oven and add the chicken breasts, skin side up. Use your tongs to nestle the chicken breasts in between the chicken legs (which should be nicely browned at this point). Return to oven and cook until chicken breasts reach 145ºF, about 20 minutes.

Always use an instant-read thermometer to confirm the temperature of the chicken breasts. The size and shape of chicken can vary widely (as will your abilities as a budding butcher). As such, the time needed for the chicken breasts to fully cook can range from 18 to 30 minutes. You do not — under any circumstances — want to serve undercooked chicken.
Once the chicken breasts have reached temperature, remove from the Dutch oven and place chicken breasts and legs on a (clean) wire-rimmed baking sheet to rest.
Return the Dutch oven to your stove and set to medium-low. Simmer the liquid and vegetables for 10 minutes, until the sauce starts to thicken.

Remove the bay leaves and thyme from the sauce, then stir in the butter and season with salt and pepper. Add half of the flat-leaf parsley and stir to combine.
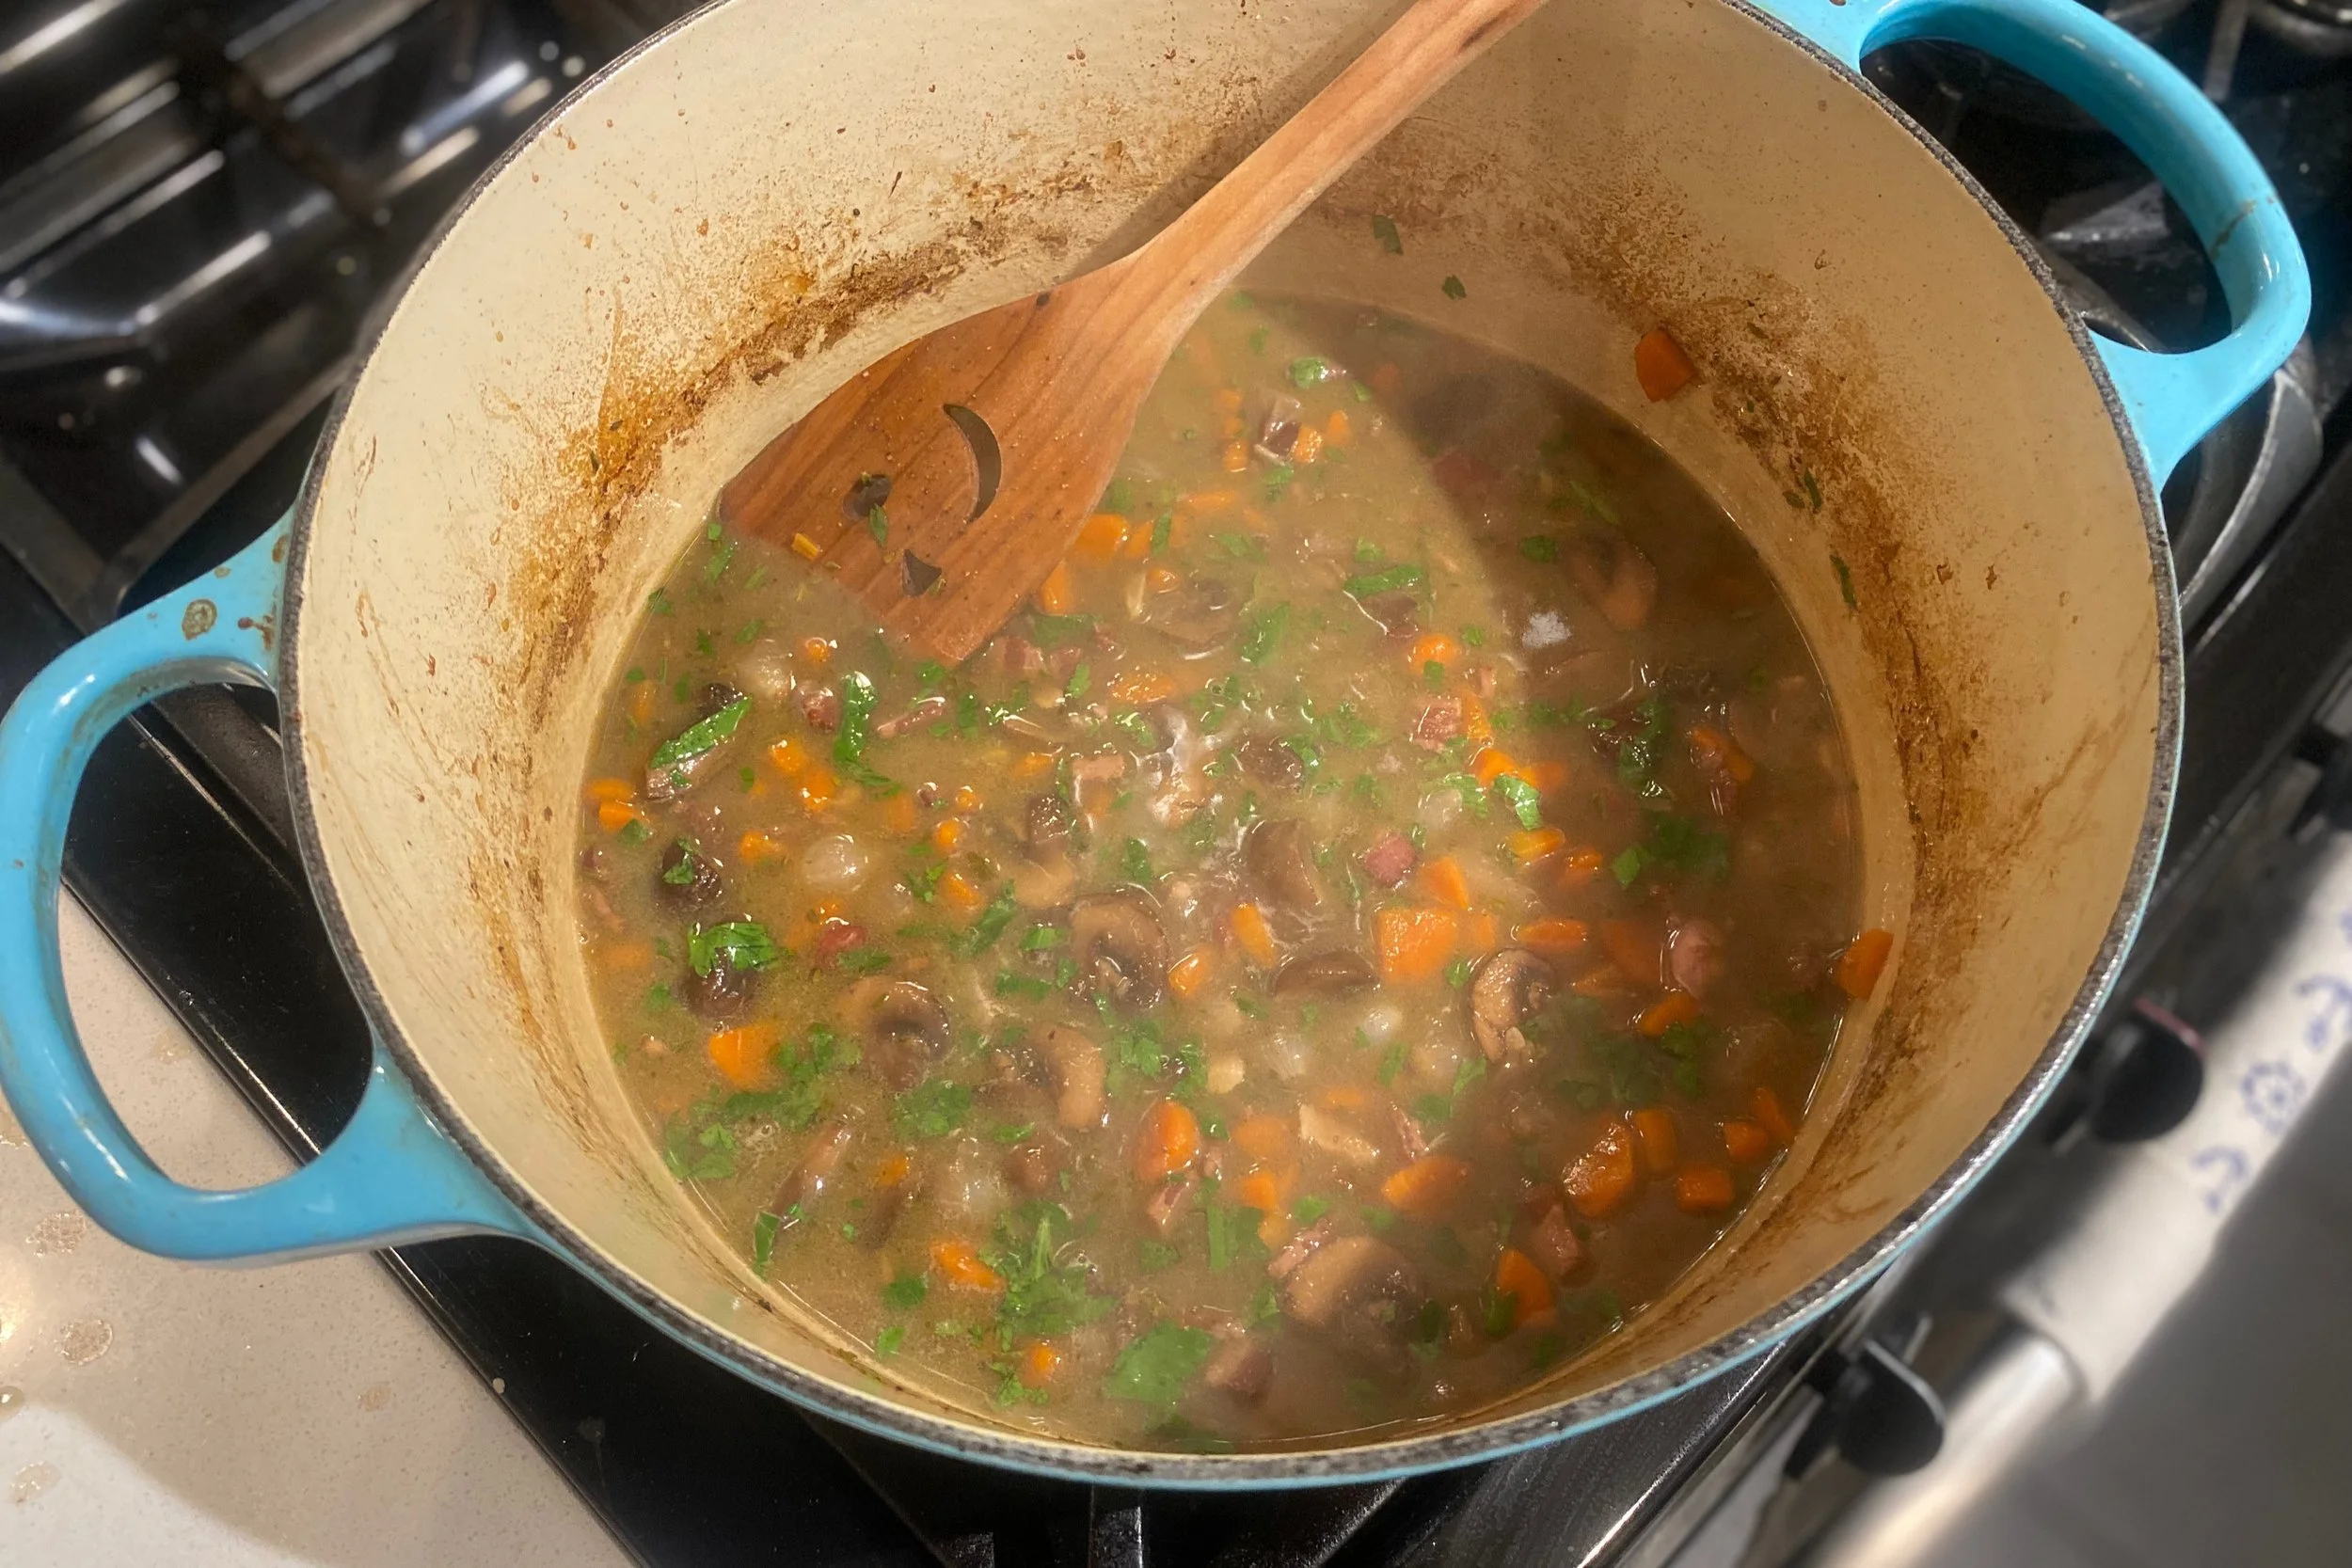
Return the chicken to the Dutch oven, sprinkle the remaining parsley overtop and serve.

Serving
Coq au vin can be served over pasta, rice or mashed potatoes. Plate each portion of chicken on top of your carb and spoon vegetables and sauce overtop (if your chicken breasts are particularly large, slice into pieces prior to serving).

Notes
On chicken:
Learning how to break down a chicken can save you a ton of money. It’s surprisingly simple to do and all you need is a good knife and a pair of kitchen sheers. Serious Eats has a great guide on how to butcher a chicken.
For this recipe, you break each chicken down into quarters, which leaves you with this:

If you don’t want to butcher your own chicken, then you’ll need 4 chicken breasts and 4 full legs (thigh + drumstick) for this recipe.
On pearl onions:
Pearl onions are delicious, but preparing them is a pain in the you-know-what. First, you have to cut and score them, then boil them, then peal the skins off of dozens of tiny onions (can you tell I’m not a fan?). Thankfully, many grocery stores sell frozen pearl onions that have been peeled for you.
So save yourself 20 minutes of prep work and do that.

Braised Collard Greens
This Asian-influenced recipe for collard greens adds soy sauce to give an extra saltiness and depth of flavor to the potlikker that makes it taste as if it had braised for far longer than it actually does. Like a cheat code for your collards.
Collard greens are a staple of southern U.S. cuisine. They’re also incredibly healthy — a single serving of collards can deliver half your daily fibre requirement and more than six times the daily recommended dose of vitamin K.
And they’re absolutely delicious…if done right.

Collard greens are easy to grow at home!
There are three common ways to prepare collard greens:
Quick Collard Greens (e.g. Brazilian Collard Greens) are made by slicing the greens very thin (almost like shredded cabbage) and quick sautéing them with olive oil and spices.
Slow-Cooked Collard Greens (e.g. Southern Collard Greens) are made by braising the greens with smoked ham hock, apple cider vinegar, garlic and spices over the course of several hours. If you’ve ever had collards in a soul food restaurant or anywhere in the Southern United States, this is what you had.
Braised Collard Greens are somewhere in the middle. They’re braised in a vinegar-based liquid similar to slow-cooked collards, but for a shorter amount of time. Bacon is used in place of ham hock to provide the umami. The slower cooking time results in greens that maintain more of their original shape and texture when compared to slow-cooked collards (which break down and are much more tender).
While I love southern-style collard greens, my favorite preparation to make at home is an asian-influenced style of braised collard greens. Preparing the ingredients takes only a few minutes, with the braising process just under an hour (plenty of time to prepare whatever other dishes you plan to serve). The addition of soy sauce to the braising liquid gives an extra saltiness and depth of flavor to the potlikker that makes it taste as though it were braising for far longer than it actually does - like a cheat code for your collards.
Braised Collard Greens
Adapted from Momofuku: A Cookbook by David Chang and Peter Meehan.
Serves: 4
Preparation time: 10 minutes
Cooking time: 45 minutes
Ingredients
1 bunch collard greens
1 piece of bacon (substitute 1 tbsp olive oil to make vegan/vegetarian)
1 tbsp soy sauce
1 tbsp brown sugar
1 tbsp sherry vinegar
1 cup water
Pinch of kosher salt
Preparation
The most important step in making good collard greens is to wash them thoroughly. Greens can be very sandy, so it’s essential to get the grit off if you want them to have the best flavor and texture. If you’ve ever washed rice before, it’s the same concept.
Start by cutting the center rib / stem off of each leaf (leaving you with twice as many “half-leaves”).
Fill your sink with lukewarm water. Submerge the leaves in the sink and gently scrub them between your hands (imagine that you’re washing delicate “hand-wash-only” clothes). Empty the sink, rinse the leaves with clean water from the tap and repeat. Do this 2 or 3 times until you’re confident that the sand is gone.
Next, coarsely chop the leaves. You want to end up with pieces that are about 2” in size (small enough to eat without being too small).
If you have a salad spinner, place the leaves in there and give them a few spins to dry off the excess water (otherwise, use a paper towel to gently press away the moisture).

In a measuring cup or bowl, add the soy sauce, brown sugar, sherry vinegar and water and stir to combine. Set aside the mixture.
Place the bacon in your sauté pan and heat over medium-high.
Once the bacon strip has started to render a good amount of its fat, add the collard greens. Use your cooking tongs to toss the leaves in the sauté pan in order to coat them with the bacon fat.
Add a large pinch of kosher salt and cook the leaves, stirring frequently until they start to release the moisture held within and just barely start to shrink. This should take 2-3 minutes.
Pour the soy sauce mixture into the sauté pan, reduce the heat to low and cover with the lid. After a couple of minutes, lift the lid to check what’s happening. The liquid should be gently simmering. Adjust the temperature if necessary.
Simmer for another 40 minutes, lifting the lid and stirring every 10 minutes or so, until tender.
Serve warm.

Apple Cinnamon Pancakes
Apple cinnamon pancakes are easy to make, full of flavor and are certain to put a smile on everyone’s face.
One of my favorite family traditions is pancake Sundays. Every Sunday morning, I wake up early with the kids and make pancakes with them while my wife gets some well-deserved bonus sleep.
We make many different variations of pancakes, but the clear favorite amongst the Neumann children is apple cinnamon. They’re easy to make, full of flavor and are certain to put a smile on everyone’s face.
Oh, and spoiler alert: I don’t make them from scratch.

Over the years, I’ve made plenty of batches of pancakes from scratch. But that all changed about 10 years ago, when I attended the Fancy Food Show in San Francisco. A Park City, Utah-based company called Kodiak Cakes had a small booth where they were sampling their pancake mix. I was blown away.
It was several months before I could get my hands on a box in California, but from that day forward, I’ve never made pancakes from scratch (and I’m far from the only one — Kodiak subsequently exploded in popularity and can now be found in most grocery stores across North America).
Apple Cinnamon Pancakes
Serves: 4
Preparation time: 10 minutes
Cooking time: 10 minutes
Ingredients
1 egg
¾ cup milk
1 tbsp oil
2 apples
2 tbsp butter
2 tbsp brown sugar
½ tsp ground cinnamon
Preparation
Preheat a skillet to medium-high.
Start by preparing the pancake batter: in a medium bowl, combine the pancake mix, egg, milk and oil and whisk together until smooth (though do not overbeat). Put the batter to the side.
Next, peel, core and dice the apples into small pieces (about 1/4” cubes). You want the pieces to be small so that they fit into the pancakes (we’re going to use half of the apple mixture inside the pancake batter and half as a topping).
Heat a small sauté pan on medium and add the butter. Once the butter has melted, add the diced apples, brown sugar and cinnamon then stir to combine.

Sauté the apple mixture, stirring every minute or so to ensure that all of the apples are coated with buttery sweet goodness and cook evenly. The apples are ready when they’re slightly soft and the entire mixture is a nice, light brown color (about 4 minutes).

Once the apples are ready, remove from heat and pour half of the apple mixture into the pancake batter (including half of the buttery, sweet sauce). Use a large spoon to fold the apples into the batter. Return the other half to the stove and turn the heat to low (at this point, we’re just keeping the remainder of the apple mixture warm).

Some pancake recipes suggest that you use cooking spray or another oil on your skillet before cooking, but if you’ve properly preheated the skillet (and it’s clean), then you shouldn’t need any extra oil.
Using your large spoon, pour about ¼ cup of batter per pancake onto the skillet (you can also use a ¼ cup measuring cup, but I find using a spoon easier). The pancakes will not be perfectly round — because they’re filled with apples — so don’t worry about the shape. Cook for about 2 minutes, until bubbles start to form on the surface and the edges just barely start to look “dry”. Using a spatula, flip the pancakes over.
The pancakes should look a nice golden brown color. If they’re too light (or too dark), you may need to adjust the temperature of your skillet. (Don’t worry if you screw up your first few batches — every skillet is different and it will likely take you a few attempts to get the temperature right.)

After you’ve flipped the pancakes over, cook for another 1-2 minutes. This time, pay attention to steam coming out of the pancakes. When the amount of steam starts to reduce, they’re ready. Remove from the skillet and set aside on a plate. Repeat until you’ve used up all the batter.
Serving
Top each serving of pancakes with some of the remaining apple mixture (and, optionally, maple syrup) and serve hot.

Lentil, Okra and Coconut Stew
This recipe is based on a style of lentil stew that is popular throughout the Caribbean. It’s simple, easy to make and packs a ton of flavor.
I absolutely love okra. Its grassy, earthy flavor. Its unique shape and texture. Fried, sautéed or stewed, I can’t get enough.
Not everyone feels that way though. In fact, okra is a somewhat polarizing ingredient, because it’s texture can become “slimy” when prepared certain ways.
That change in texture is caused by a gel-like substance called mucilage, which is released when okra is cooked (aloe, seaweed/kelp, and figs are also high in mucilage). But guess what? Okra mucilage is an excellent thickening agent, which is why many cultures use it as an ingredient in stews and soups.
This recipe is based on a style of lentil stew that is popular throughout the Caribbean. It’s simple, easy to make and packs a ton of flavor. With a thick, satisfying consistency and a hint of spice, it’s the perfect dish for cold, Canadian winters.
Lentil, Okra and Coconut Stew
Adapted from Black Food: Stories, Art, and Recipes from Across the African Diaspora by Bryant Terry (recipe by Nina Compton).
Serves: 6
Preparation time: 10 minutes
Cooking time: 50 minutes
Ingredients
3 tbsp olive oil
1 cup of okra, cut into ¼ slices
1 large onion, diced small
4 cloves of garlic, diced small
1 stalk of lemongrass, smashed and then very finely chopped
2 tbsp diced ginger
6 tsp curry powder
2 tsp kosher salt
1 habanero chile, cut in half with seeds and stem removed*
1 15 oz can of crushed tomatoes
1 13.5 oz can of unsweetened coconut milk
1 cup red split lentils
6 cups water
1 bunch of cilantro, leaves picked and roughly chopped
3 green onions, sliced thin
* Habanero chiles can seem scary to people who don’t like spicy foods, but don’t be intimidated. The inclusion of a single chile in this recipe provides a note of heat to the stew that is balanced and in no way overpowering (that said, if you really can’t deal with spice, feel free to omit or start with half a chile).
Tools and Supplies
Large (6.7L) Dutch oven
Blender
Wooden spoon
Ladel (large soup spoon)
Preparation
Start by slicing and dicing all of your ingredients. This dish has a fairly involved preparation at the start, so you want everything ready to go.

I love okra.
Heat the olive oil in your Dutch oven over medium-high heat. Once the oil begins to shimmer, add the diced onions and cook, stirring frequently with your wooden spoon so that they don’t scorch. Cook until the onions start to turn translucent (about 6 - 8 min).
Next, add the garlic, ginger and lemongrass, stirring constantly until the garlic just barely starts to turn brown (4 - 5 min).
Reduce the heat to low. Add the crushed tomatoes, 5 out of the 6 tsp of curry powder, and the habanero chile. Stir constantly until you can smell the aromas of the spices and the mixture begins to stick to the bottom of the Dutch oven (about 2 min).
Add the coconut milk and use your wooden spoon to scrape at the bottom of the Dutch oven to loosen anything that started sticking. Add the lentils, salt and water and stir to combine.
Increase the heat back up to medium-high and bring to a boil. Stir a few times and reduce to medium-low or low — whatever temperature allows you to maintain a gentle simmer. Simmer for 30 minutes uncovered, stirring occasionally until the lentils have broken down and the stew has thickened.

Using your ladel, carefully spoon half of the stew into your blender — making sure that you include the habanero chile — and puree until smooth (about a minute).
Pour the puree back into the Dutch oven. Add the okra and the remaining tsp of curry powder and stir to combine. Simmer for another 2 - 3 minutes (just long enough for the flavors to meld). Taste and add additional salt as needed.
Serving
Top with green onions and cilantro and serve either on its own or atop steamed rice.

Larb (ลาบ)
Larb is a type of meat “salad” popular in Laos and Thailand that is both easy and fast to make, so it's perfect for founders on a busy schedule.
Larb (pronounced /laab/ — the “r” is silent) is a type of meat “salad” popular in Laos and Thailand that is made by combining ground or chopped meat with fish sauce, lime juice, toasted rice powder and herbs. Most Thai restaurants in North America have a variation of larb on their menu, typically made using ground pork, ground chicken or duck. My favorite take on larb is at Lers Ros in San Francisco, where they offer a variation made with BBQ duck that’s unbelievable.
But guess what? You can also make vegetarian larb by substituting Impossible Beef, Beyond Beef or another plant-based alternative (note that if you want to make it fully vegetarian/vegan, you need to substitute the fish sauce for a vegan alternative).
The traditional form of larb is both easy and fast to make, so it’s perfect for a busy schedule. The entire preparation is effectively “chop up a bunch of ingredients, brown the meat, and then mix it all together.”
Larb (ลาบ)
Serves: 3 - 4 as a main course / 5 - 6 as a side dish
Preparation time: 10 minutes
Cooking time: 10 minutes
Ingredients
1 lb ground pork (or ground chicken, or Impossible Beef, or…) (see Notes below)
1 medium shallot, thinly sliced
1 tbsp lime leaves, thinly sliced (approximately 5 leaves) (see Notes below)
5 sprigs cilantro, chopped
1 green onion, thinly sliced
1 tbsp toasted rice powder (see Notes below)
1½ tbsp fish sauce (substitute a vegan “fish sauce” if making vegetarian/vegan larb)
1 lime
2 tbsp water
Chili flakes, to taste (I like two giant spoonfuls)
Preparation
Start by prepping all of your ingredients. When slicing the shallot and lime leaves, your goal is to make them as thin as possible (~1mm). These ingredients will all be served raw in the salad, so if the pieces are too large, the texture will be off-putting when eating it.

For the lime leaf, the easiest way to slice it is to roll up one or two leaves in the direction of the stem and then cut inwards from each side:

Once you’ve got all of your ingredients ready, it’s time to brown the ground pork (or ground chicken, or Impossible Beef, or…)

Cooking
Heat a medium sauté pan on the stove over medium-high heat. Cook the ground pork, stirring frequently with a wooden spoon so that it doesn’t scorch. Cook until the ground pork is thoroughly browned. Add the water, stir for 10 more seconds and remove the sauté pan from the heat.

Add the shallots, lime leaves, cilantro, green onions, and toasted rice powder to the meat. Juice the lime into the mixture, add the fish sauce and mix it all together.

At this point, you need to let your tastebuds guide you.
The flavor of the larb should be a perfect mixture of salty (from the fish sauce), sour (from the lime juice) and spicy (from the chili flakes), with a bit of citrusy sweetness from the lime leaves. Feel free to add a bit more of any (or all) of these ingredients to get your perfect flavoring — just don’t overthink it!
(You can also make different combinations: when I make larb for my family, I split it into two portions: one without chili flakes for the kids and one with a healthy dose of spice for the adults.)
Serving
Larb is traditionally served with steamed jasmine rice and leafy green lettuce. It can be eaten as a lettuce wrap or plated like a traditional salad (with the lettuce broken into smaller pieces).

Notes
On ground pork:
If you want your larb to have the best flavor, do not under any circumstances buy “lean ground pork” at the grocery store. While it may sound like a healthier alternative, it has so little fat content that the meat will not absorb the flavors of the dish and you’ll end up with something more akin to rubber pellets covered in herbs. Just don’t do it.
Go to a local butcher shop and get good, high quality, free-of-crazy-antibiotics ground pork. You’ll thank me later.
On lime leaves:
You can find lime leaves at almost any Asian grocery store, as well as many chains. If you can’t find lime leaves, you can substitute mint leaves, but you will lose the unique citrus flavor that comes from this ingredient.
On toasted rice powder:
Toasted rice powder acts as a thickening agent for the sauce, while also adding a depth of flavor to the dish. While it’s possible to make larb without rice powder, it doesn’t taste nearly as good, so I recommend you make some (thankfully, it’s easy to do).
To make toasted rice powder, place a couple of handfuls of jasmine rice directly in a small sauté pan over medium-low heat (no oil or anything else…just the rice). Stir or shuffle the rice every 20 seconds or so and allow it to brown until it approaches the color of coffee. This will take about 20 minutes, so put on an audiobook or listen to some music while making sure your rice doesn’t burn.

Once the rice has browned, grind it into a powder using a mortar and pestle or spice grinder. Store the toasted rice powder in an airtight container for up to 6 months.

Before

After